Important!Read This First!
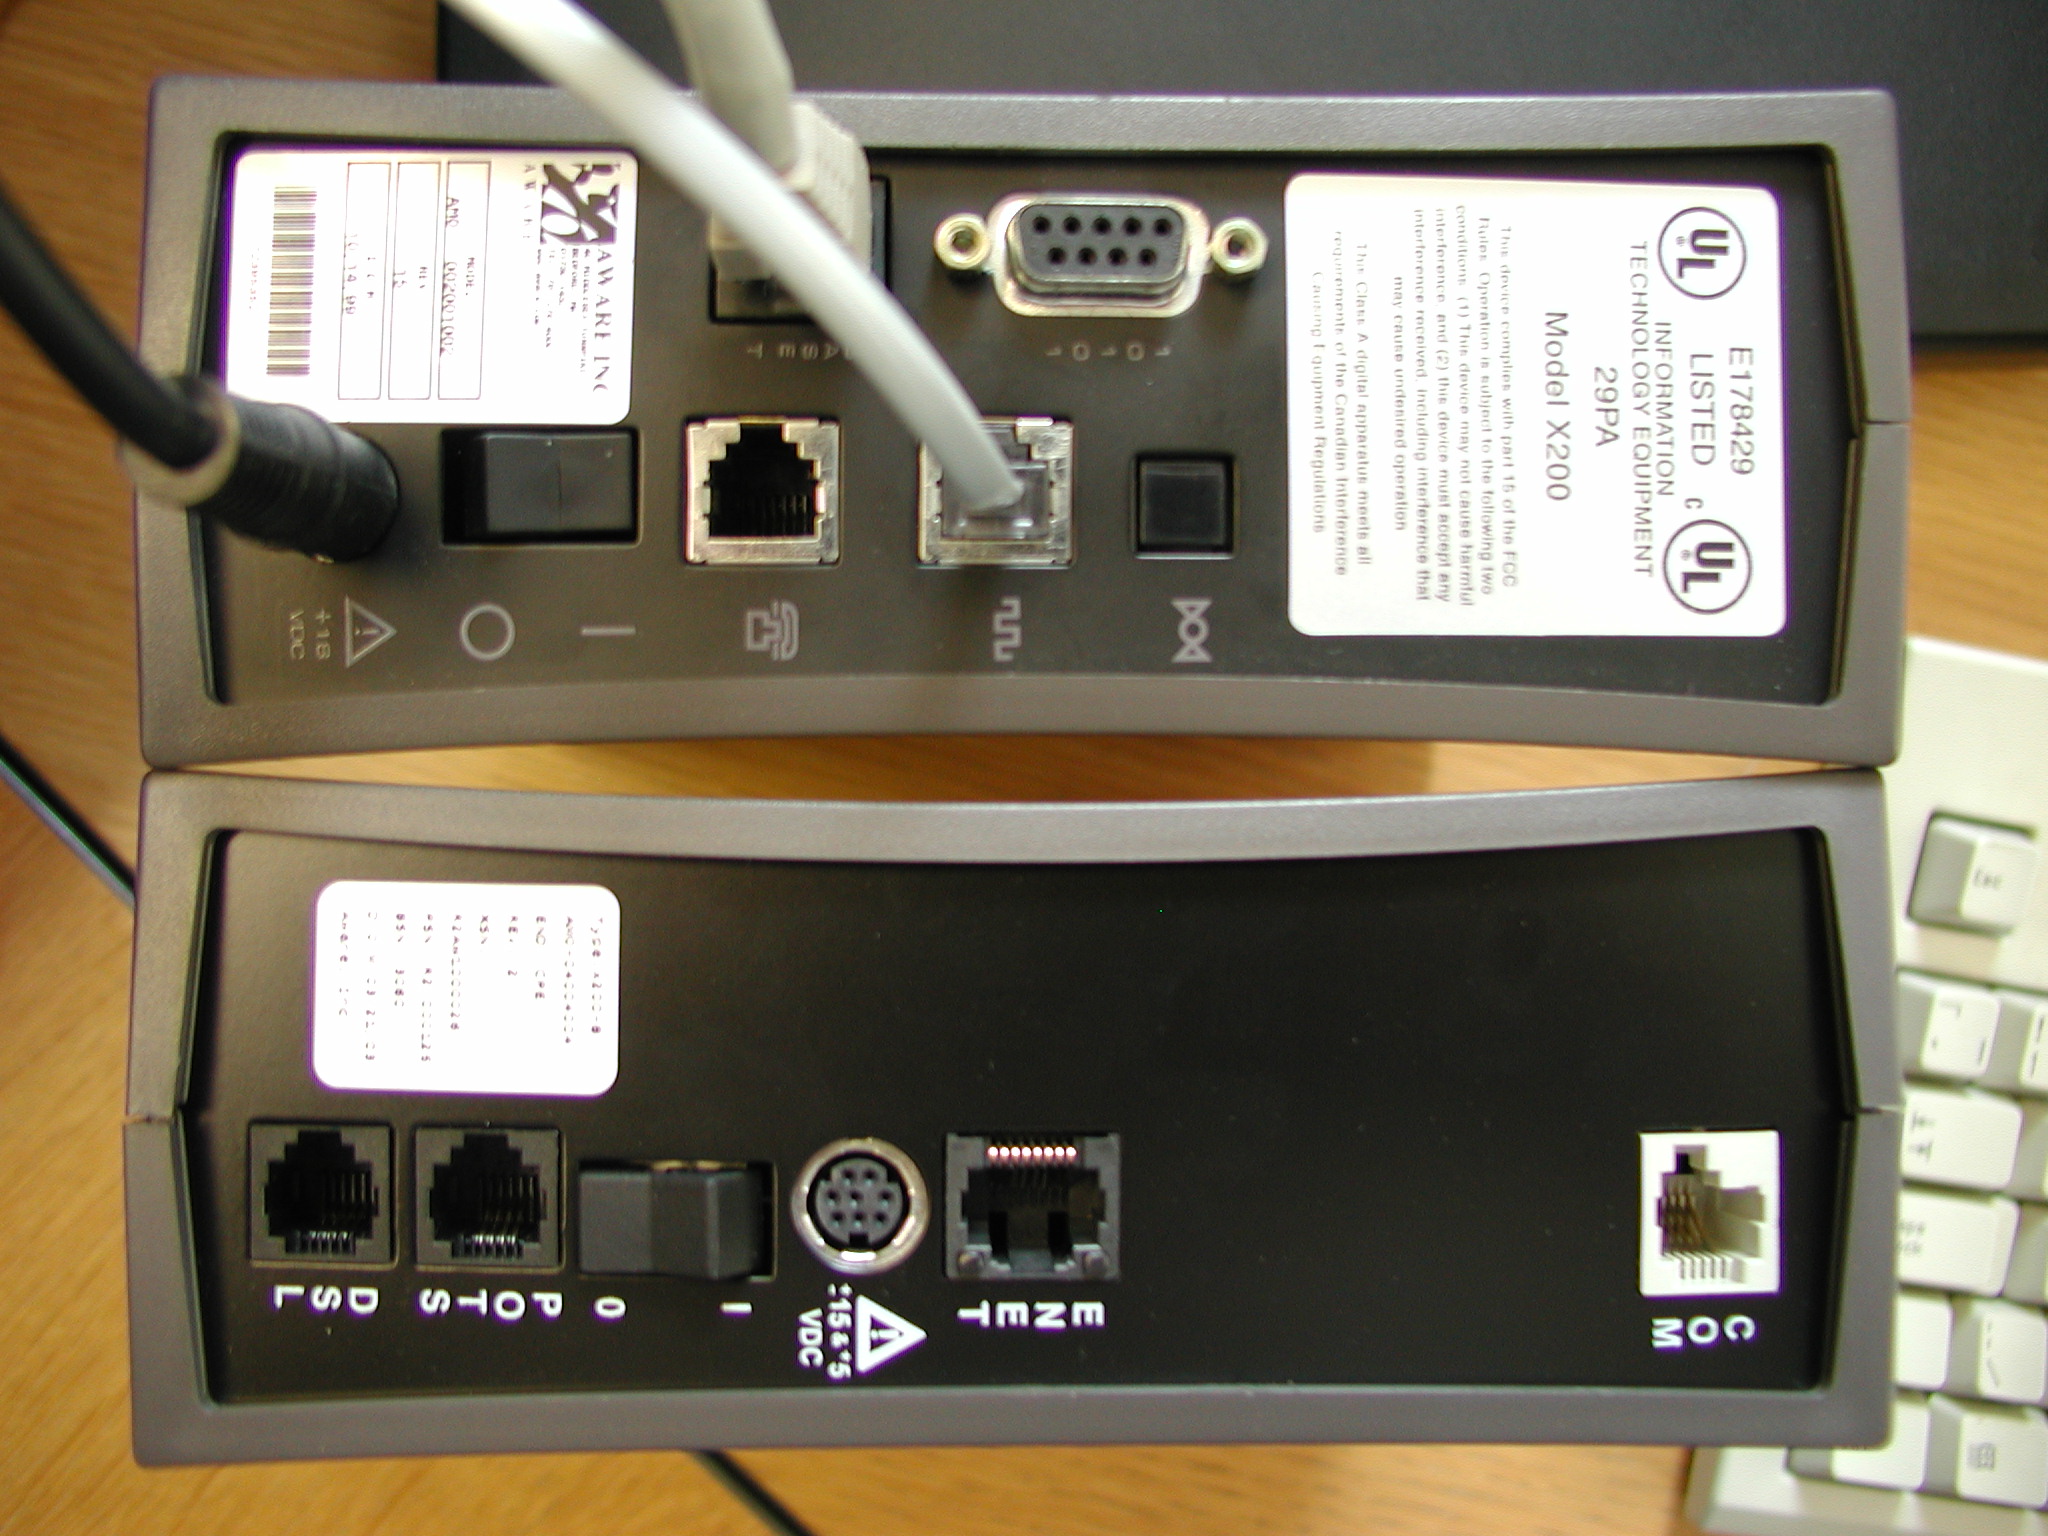
There are two variants of X200 ADSL modem for use with the Penguin
system. The older variants can be recognised by having an input voltage
of 18V and having a 9-way D-type serial port on the rear. The newer model
requires a 15V supply and has an RJ-11 style serial port. Voltages are
marked on both the power supplies and the modems, so ensure that you have
the power supplies matched to the right modems!
Below is a picture of the older modem (top) and the newer modem (bottom) to allow you to compare the difference in port arrangements and logos. Click on the picture to get an enlarged image.
Method
The modems can be configured in two ways, firstly by using a terminal
program and going in over the serial port, and secondly by telnetting into
the modem over the network - obviously this is only going to work if the
modem is already setup correctly on the network concerned, so the examples
will concentrate on the serial port method.
Cabling
The newer modems are supplied with 9-way D-type to RJ-11 serial cables.
The old modems require a standard 9-way female to 9-way male modem lead. If one cannot be found, a cable can be made using one 9-way female and one 9-way male D-type connector, and a length of five-core cable. Pins 2, 3, 5, 7 and 8 should be passed straight through, and on the male (modem) end, pins 1, 4 and 6 should be wired together.
Connecting To The Modem
At this point you have a choice. Talk to the modem using the Linux
Minicom program on Emperor, or find another PC with Windows and Hyperterminal
on. The latter is definately recommended for people who are unfamiliar
with Linux.
Plug in the modem serial cable to the PC and modem, make sure the modem has power, and then start up your prefferred terminal program. 9600baud 8 bits, no parity and 1 stop bit should enable you talk to the modem. Hitting return should display a login prompt. The username is "su" and the password is "adsl".
Configuration at SOC
In order to examine the configuration of one of the modems, first login
to the modem, and then type:
show config running
This should result in something like the following being displayed (the
results for both modems are shown):
Topmodem
! Begin config file.
!
system
function bridge
hostname adsl
login su
password adsl
!
bridge aging 5
!
tftp disable
!
router
rip disable
!
snmp
community get public
community set private
!
!
interface ether
ip address 139.166.250.18 255.255.255.0
ip mtu 1500
!
! End config file.
Endmodem
! Begin config file.
!
system
function bridge
hostname adsl
login su
password adsl
!
bridge aging 5
!
tftp disable
!
router
rip disable
!
snmp
community get public
community set private
!
port adsl
modem mode adaptive
modem speed upstream 864
modem speed downstream 10144
modem margin upstream 7
modem margin downstream 5
!
interface ether
ip address 139.166.250.19 255.255.255.0
ip mtu 1500
!
! End config file.
Changing The Configuration
Assuming the system is being moved to a ship, you'll need to allocate
four IP addresses on the ship for Penguin, Emperor and the two ADSL modems.
These IP addesses do not have to be contiguous - but it looks neater in
the hosts files if they are!
Assuming you've connected to the modem, and logged in, and that the modem is not brand new and has been previously used, all you should need to do is to change the IP address. An example of the command needed to do this is shown below:
config interface ether ip address 192.171.133.120 255.255.255.0
Once this is done, type reset and the modem will ask if you wish to save the configuration changes. Assuming you say yes it will give you an error about LAN and WAN IP addresses being on the same network. Do not worry about this, since there is no WAN - everything is part of the ship's LAN. Hit the return key and it will save to flash before asking whether you really want to reset.
Author: Paul Duncan
Date: 29/05/03